More actions
mNo edit summary |
|||
| Line 36: | Line 36: | ||
<div class="figure"> | <div class="figure"> | ||
[[File: | [[File:Getting-cpi-data4.png|637x637px|Image]] | ||
</div> | </div> | ||
| Line 45: | Line 45: | ||
<div class="figure"> | <div class="figure"> | ||
[[File: | [[File:Getting-cpi-data5.png|633x633px|Image]] | ||
</div> | </div> | ||
| Line 52: | Line 52: | ||
<div class="figure"> | <div class="figure"> | ||
[[File: | [[File:Getting-cpi-data6.png|627x627px|Image]] | ||
</div> | </div> | ||
| Line 62: | Line 62: | ||
<div class="figure"> | <div class="figure"> | ||
[[File: | [[File:Getting-cpi-data7.png|612x612px|Image]] | ||
</div> | </div> | ||
Revision as of 16:57, 17 December 2024
Once a month, the DOC will open a system ticket requesting Chest Shop data for the CPI. This is an Admin+ task.
Step 1: Finding the log file.
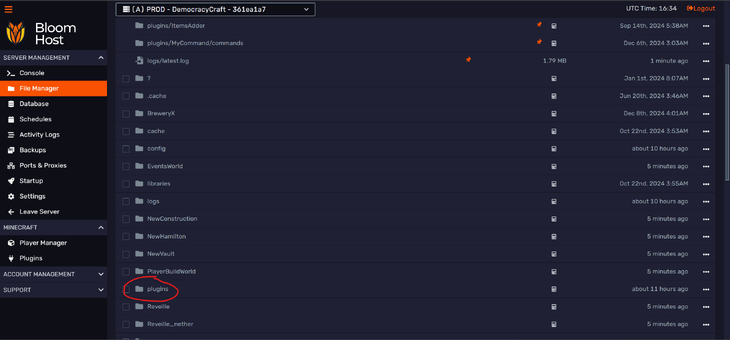
Going to your DemocracyCraft dashboard, you’ll go to File Manager on the sidebar on the right, then click the plugins folder.
Next, locate the ChestShop folder. These folders are in alphabetical order.
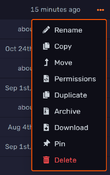
Finally, DOWNLOAD the ChestShop.log near the top by clicking the 3 dots in it’s row and clicking download.
Step 2: Collecting that month’s data
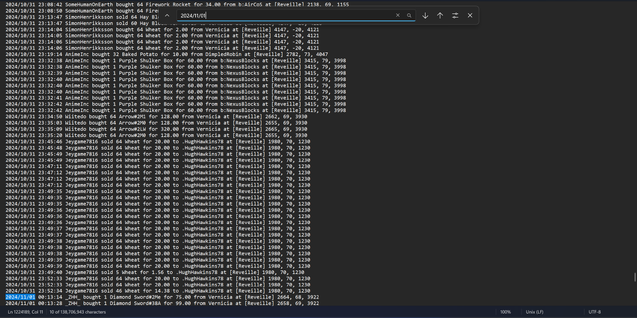
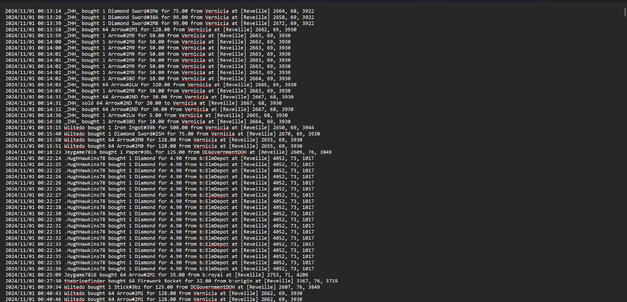
Once you download the logs, open them. Notepad works great.
Next, find the month you’re looking for by doing yyyy/mm/01. Find on Windows is ctrl+f; Find on Mac is cmd+f.
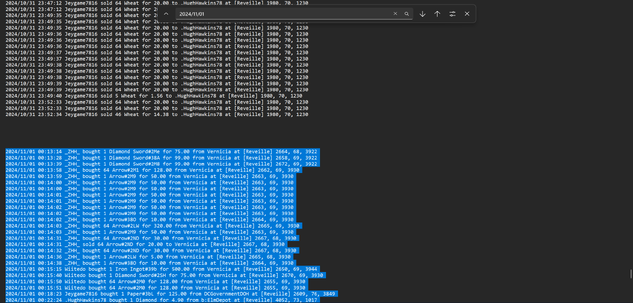
Now you’ll select all of that month’s bar. This is a lot. (Tip: put an extra space or two between the start of the month and end of the month for a more distinct start and end.)
Select all of the month’s transactions. You can click and drag, or put your cursor at the very start of the month, move down to the end, hold shift, and click the very end and it will highlight everything inbetween. (Tip: do this in sections.)
Once you’ve selected all of the month you’d like, copy and paste it into it’s own document. (Windows: ctrl+c / ctrl+v ; Mac: cmd+c / cmd+v)
Step 3: Save & send
Save the document as Month Year CPI Data.
Then just send it to the DOC in the ticket they’ve opened.

